Thursday 21 February 2013

Interview for dps: corrections made!

I had drafted my interview and sent it off for it to be marked. When I finally got my interview back, there were a lot of corrections that needed to be made, in order to ensure my interview was chatty and entertaining. These were the things/ways in which I needed to improve my interview piece:

  • To make my sentences shorter, so that it's easy to read as well as understand it.
  • I had to also think carefully  about whether I was talking to Paiidz or about her. (In the end I decided that it would be far more interesting if I was to talk to the artist. I have done so in my corrections.)  
  • I was to add more of what my artist said in my interview I had conducted with her. 
  • Lastly I had to read more examples of such articles. 
I could not find examples of such articles on the internet, however I have tried to make my interview sound more smoother. I then sent my completed corrections by e-mail for my teacher to mark. 

Wednesday 13 February 2013

Front cover update

I have created a rough layout for my magazine, using photoshop. I will be posting how my layout turned out, which ensure that some changes has to be made. I will be posting this very soon.

Monday 11 February 2013

Messing around with front cover

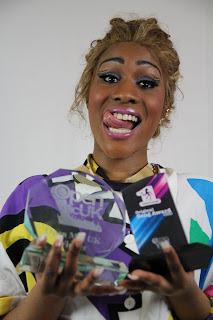
I was using photoshop in order to see how I can change my photograph of my artist. The one on the left hand side is the orginal photo I took of Paiidz. Due to the quality of my photo I found out that I did not need to photoshop anything. However I tried to play around with photoshop to see how I can change my image and still make it work.
In doing so I found out that the my removing the background of the original image, which can be seen on the left hand size, made the image looked far too cut out. This then made me think twice about the changing the colour of the background.

Wednesday 6 February 2013

Paiidz interview!

This is my finished edited interview I conducted with my artist (Paiidz). I will be posting the challenges and step by step into how I achieved my final product.

Monday 4 February 2013

First step using "Indesign"

Today was part of introducing us on how to create our own magazine front cover, contents page and double page spread, we watched a tutorial on Youtube on the first steps into creating basic template. We watched such tutorial due to the fact that we will be using this program for our own magazine (as stated before). Using "Indesign" allows one ensure that text is aligned text properly and accurately, which would make our magazine look professional. I will be looking at the rest of the over steps on Youtube, as I want to develop my understanding of using Indesign as I will be using it to create my music magazine. I will be posting the rest of the tutorials for the next step very soon. Thanks

Sunday 3 February 2013

Messing around with edits (contents)

          
This is an edit I have created, using "Befunky".  Befunky is based online, which allows one to edit photographs and share online. I wanted to play around with the edit, as I wanted to find out what I could do and improve my picture.

For this edit, I have increased the light that is exposure, whilst casting a shadow over certain areas, in order to ensure that her face can be visible. Whilst looking back at the photograph, the image I captured was far too dark, which meant that it was hard to see my artist facial expression. By editing and enhancing the light exposure, brings out the artist eyes which allows the audience to see her personality. Lastly I have applied some lip stick on her lips, in order to make the picture look vibrant, and giving her a shine.


This is the image before any editing was done, as you can see, the image is very dark, making it hard to see my artist. As you can see her, you can no longer see the background, which was a bad shot, as you can see the mistake within the mise-en scene (top of screen/ ceiling). 


Friday 1 February 2013

Paiidz photoshoot (RAW)

priscilla20131's  album on Photobucket
These are the pictures that I took on Wednesday of my artist (Paiidz). I wanted to post all the photographs that I took without any of them being deleted or edited, hence why it's "raw" photographs. The main reason as to why I personally chose not to delete or edit any comes down to the fact that, I wanted my audience to see some of the images I took before editing. I thought it was better to put together a slide show of all the images I took of my artist using "photobucket", which is based online where one can upload and share their images with friends. Putting my photos into photobucket allowed me to clearly see some of the mistakes, which I was unable to see previously whilst taking my photographs. Such mistakes includes lighting not properly positioned on the artist, and in doing so caste a shadow on the artist which make the photograph appear too dark. In contrast some of the images I took contained far too much light, causing Paiidz to appear far too orange and unnatural.

 In addition to this, some of the elements did not work such as trying to capture Paiidz blowing bubbles, although in the end I was able to capture her blowing into camera, most of the time it failed. I think it mainly failed due to the fact that the colour of the background crashed with the bubble and so therefore was not visible. To improve I will ensure to change the colour of the screen, if I want to experiment with bubbles to possibly black screen, instead of white. Another one of my experiments that did not work in the early stages, can be seen when I had tried different angles by shooting Paiidz through someone's arm. Next time, I will ensure that I only capture and cut off a section , so that I can only see the artist face, rather than my assistance's arm.

 What did I learn from my photoshoot with Paiidz?
 I learnt that although she is photogenic, the convention of hip hop magazine pose of a hard looking image (angle of gaze with no smile) did not work on my artist. The main reason comes down to the fact that it was her personality to be smiley and fun, which made it easy for my to capture her personality.

Contents page photographs (RAW)

This is a slide show I have created using "Flicker". I wanted to put a slide show together of all the images that I have taken to far for my contents page.These are the raw images straight from the camera, I have not deleted any of the photographs that I have taken due to the fact that I wanted to see how they would look like both and after editing. I also have chosen not to delete any of the photographs, as I wanted to know how to improve, as well as develop my photography skills for my next photo shoot. From looking at these photographs I can see what, in order to get a better photograph, I must ensure that my model/ artist is framed perfectly in order to avoid unwanted things within the shoot. The mise-en-scene and the framing of my model/artist was not done properly due to the fact that some of the mistakes are visible e.g. frame of stand. I can improve this by double checking that nothing is in the background whilst taking my shots.In addition, I can also improve my photography skills by ensuring that I take wider range of shots, such as possibly long shots and other interesting angles.

How my photoshot went with Paiidz update

Here are a couple of pictures I took on my photoshot, which I may be using for my magazine.I have not yet decieded which onces I will be using for my front cover.